

1
Go to Locations & Settings
To create your first store, navigate to Locations & Settings by clicking More on the sidebar.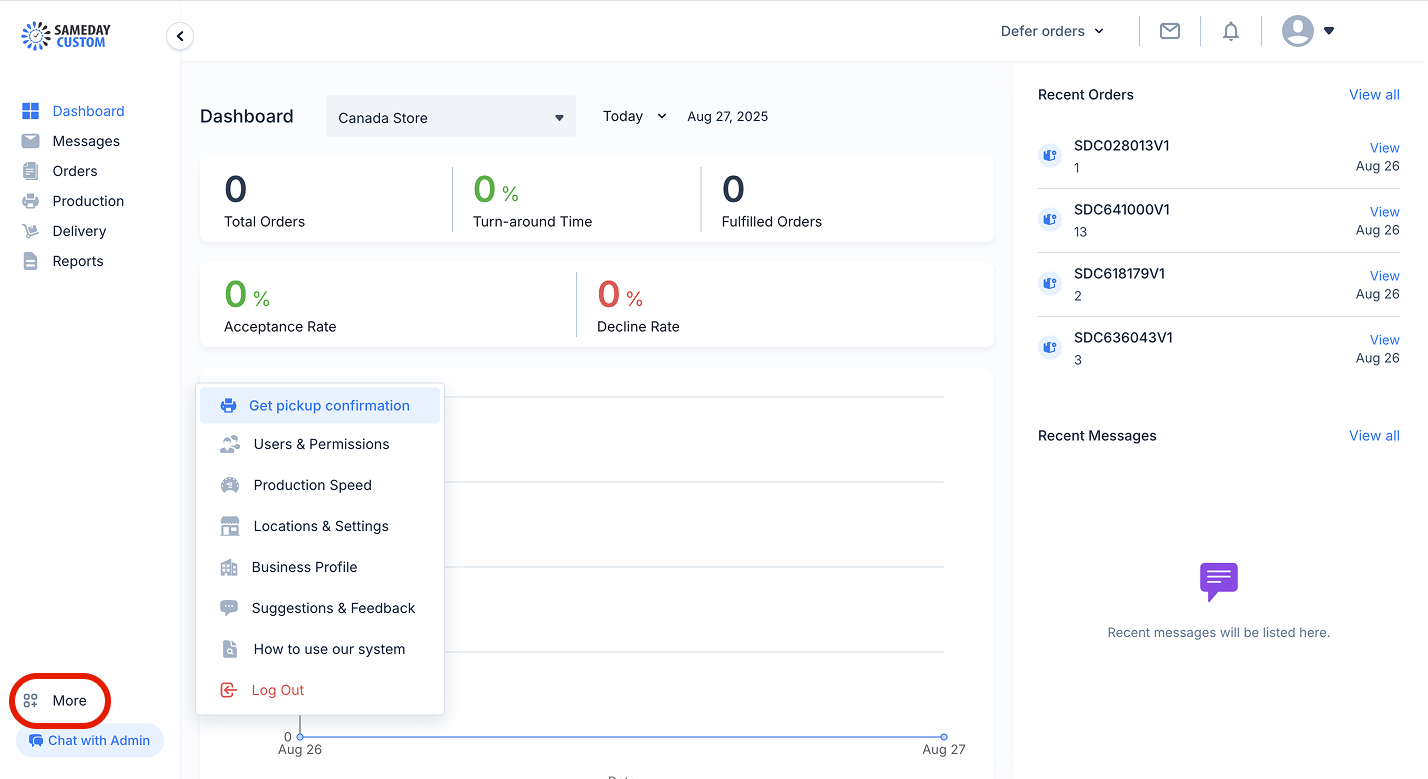
2
Add a location
Click Add a Location to create a store.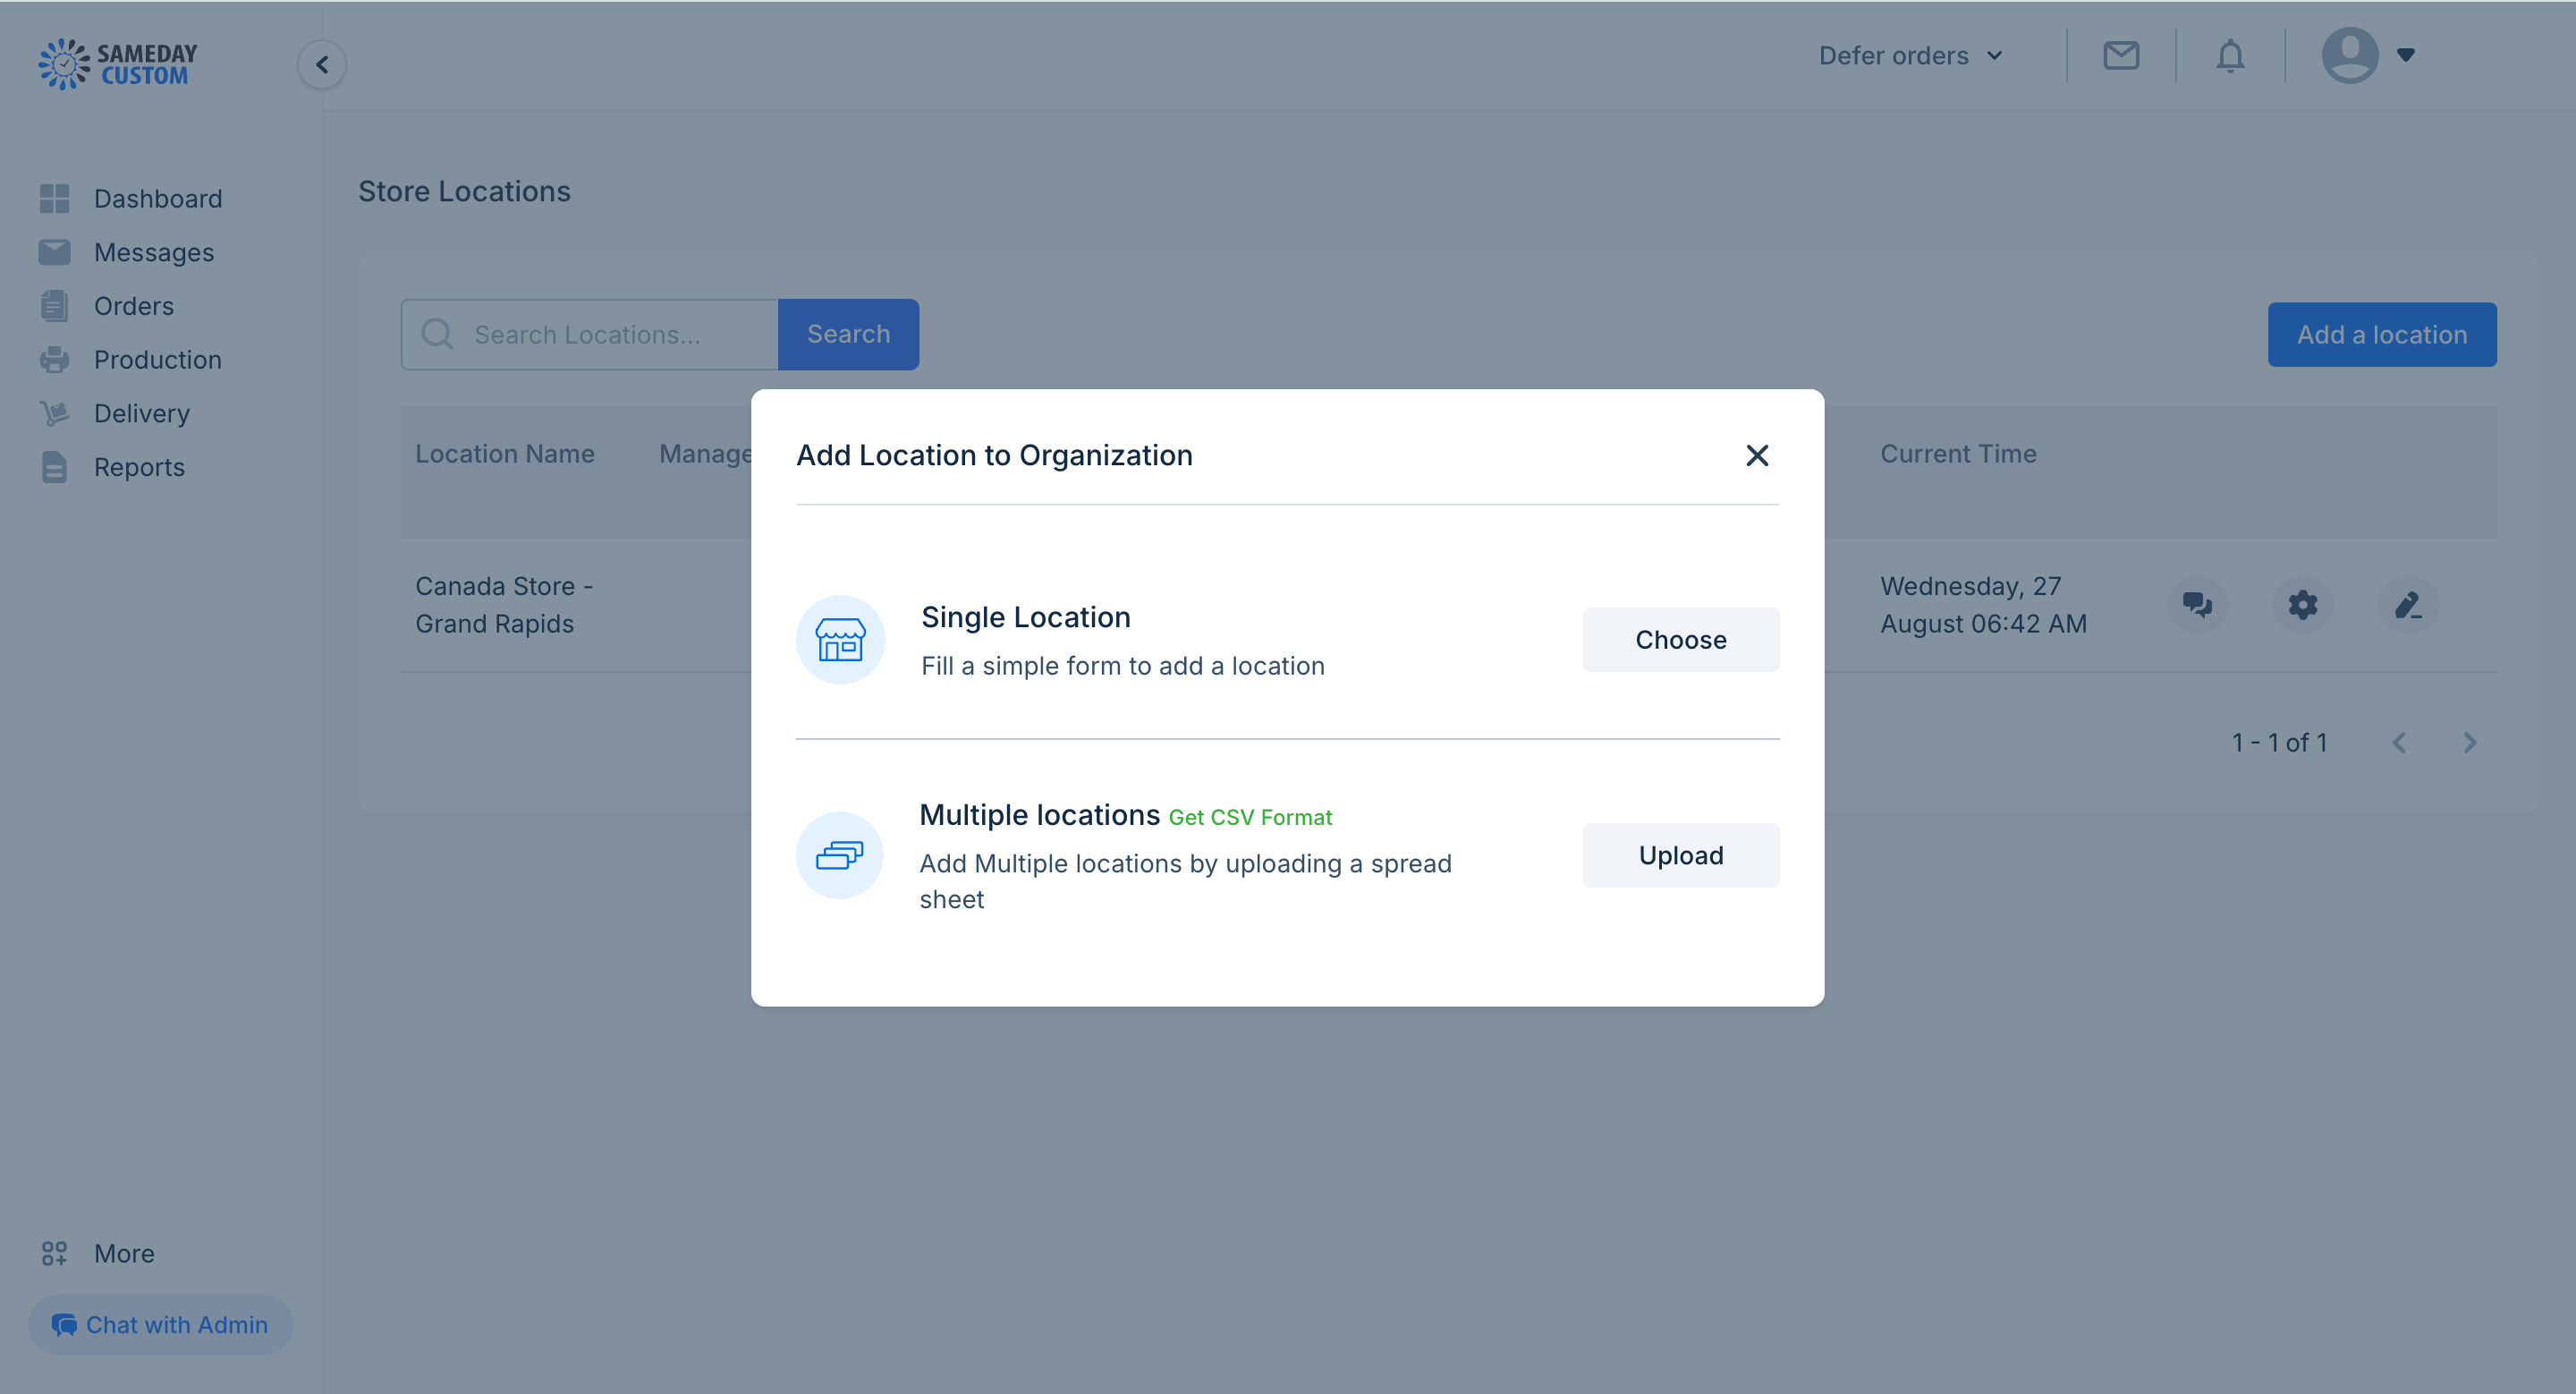
You can add a single store or add multiple store locations at a time
To add multiple locations at a time, simply download the CSV Format, fill in as many stores as you want to add and upload to the system
3
Add a single location
The following information should be submitted to create a store location.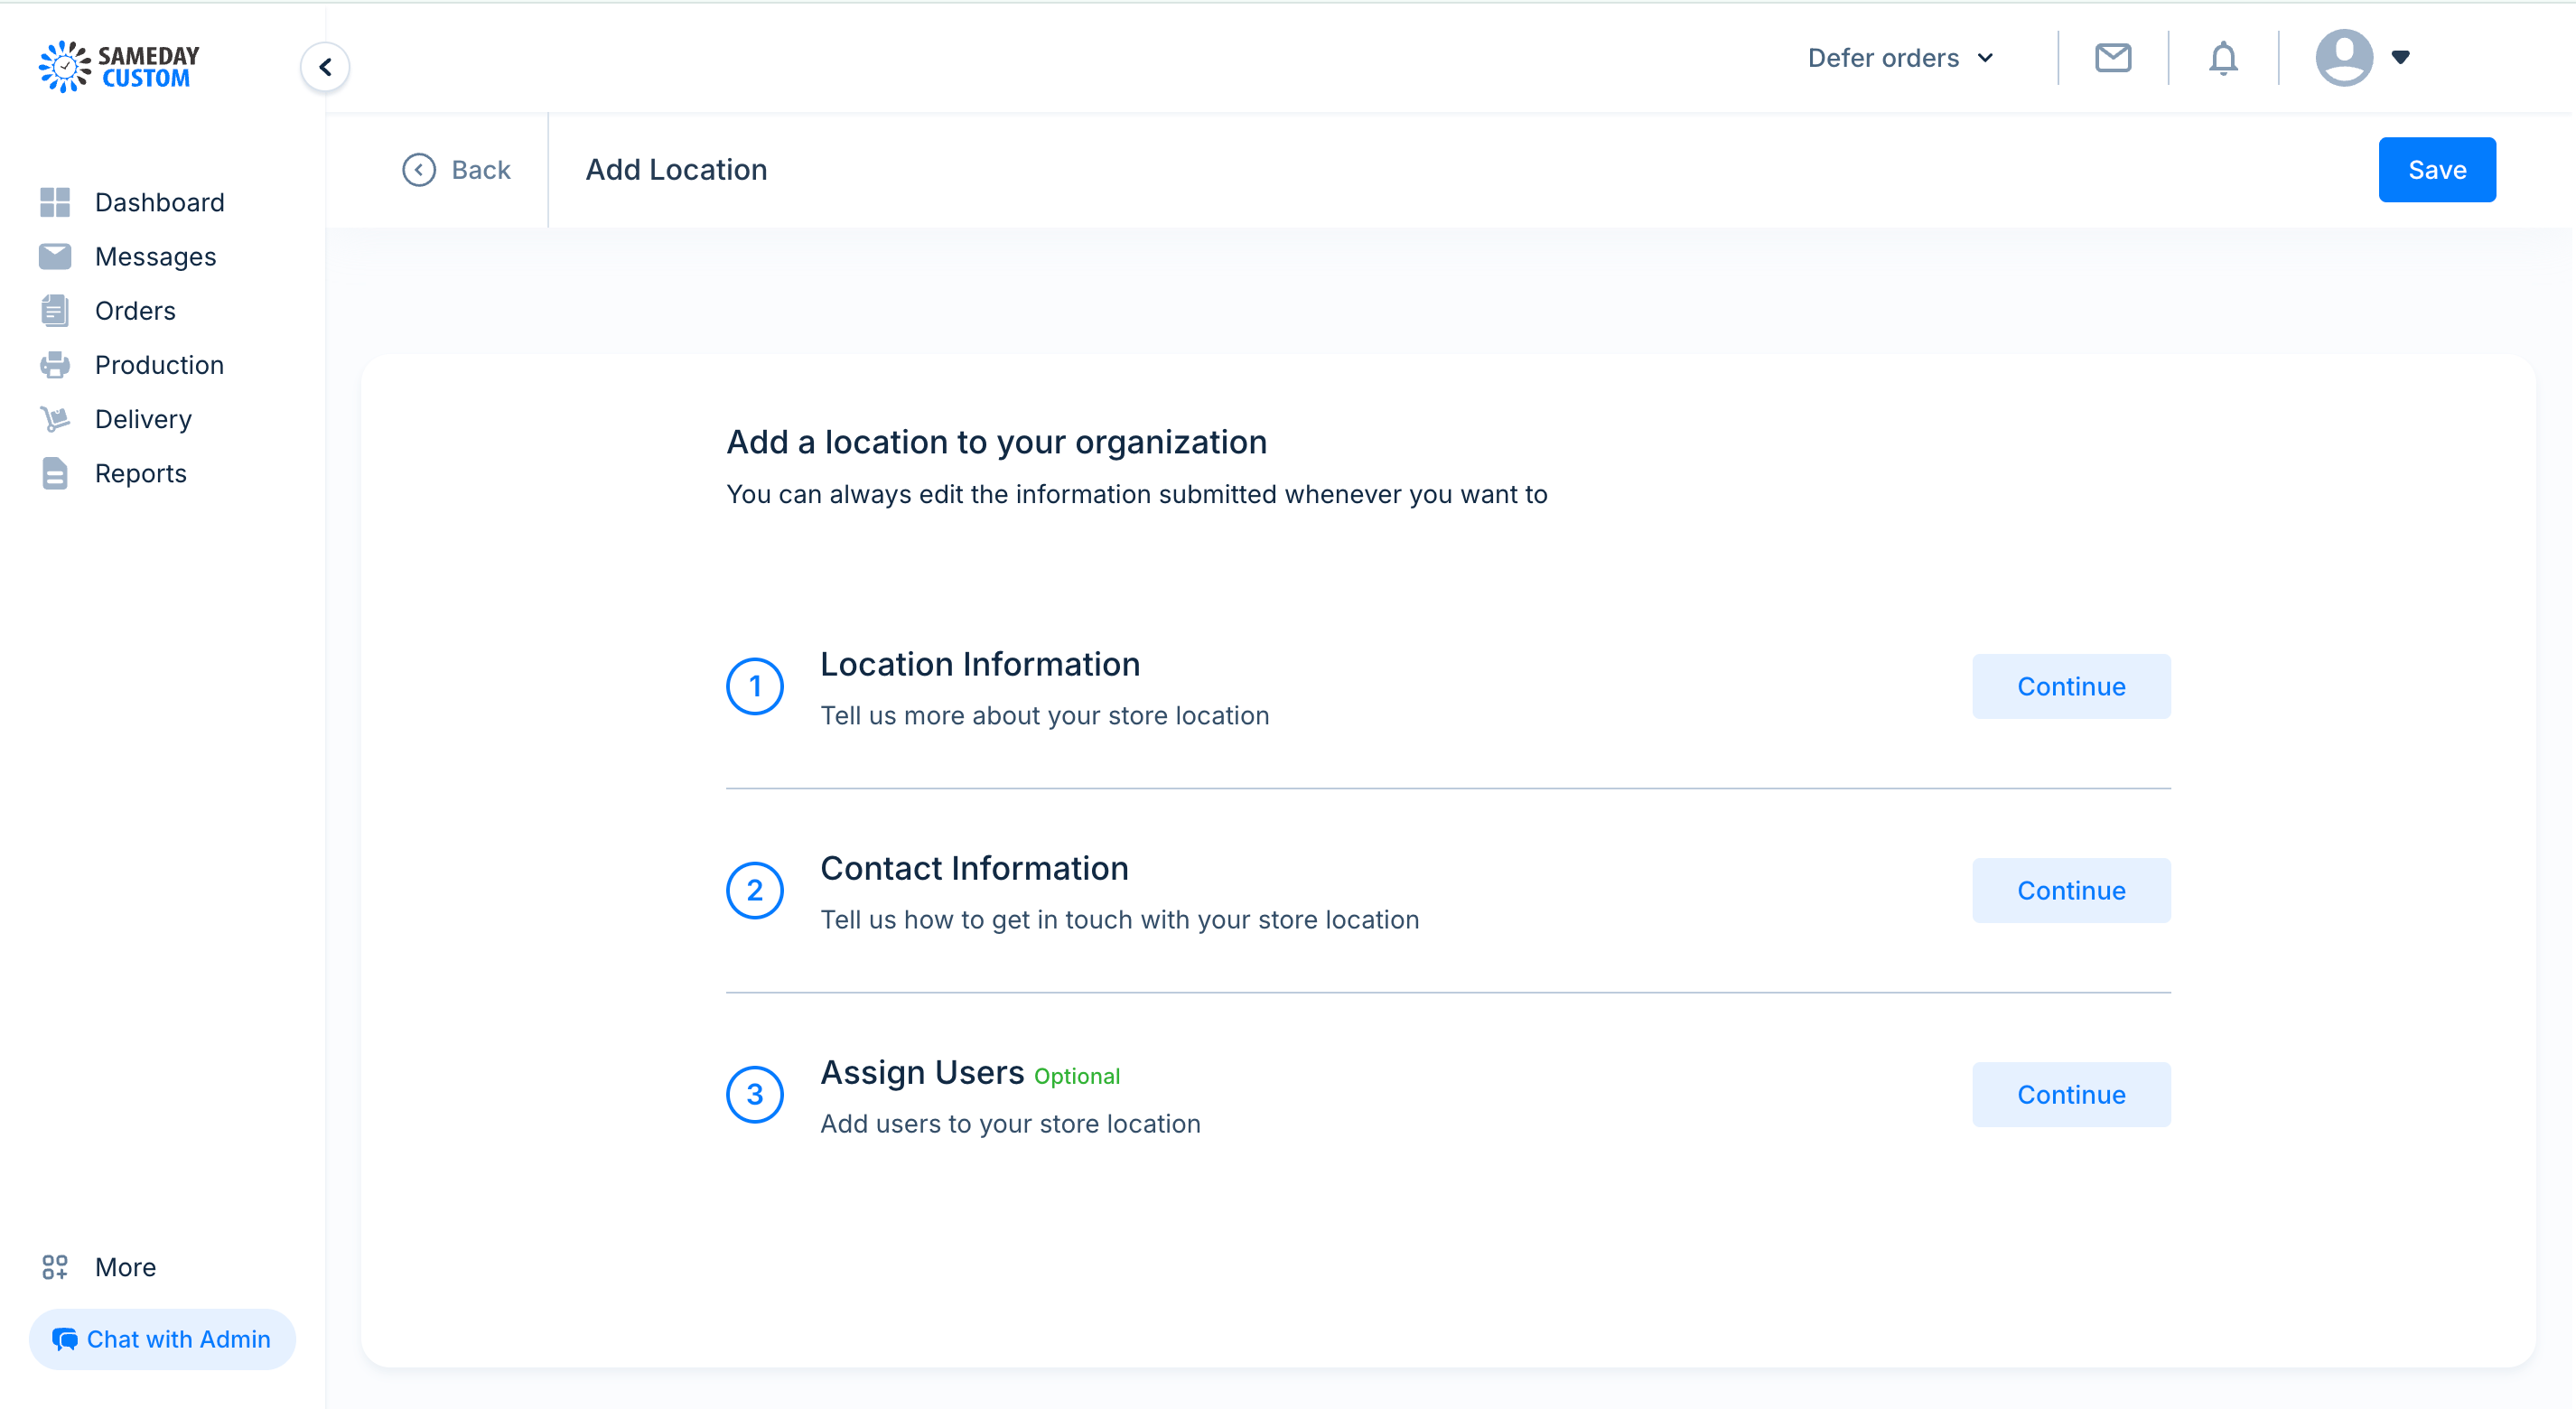
You can add a single store or add multiple store locations at a time
- Shop name
- Suite Number (Optional)
- Street Address (uses google geolocation to get accurate addresses)
- City
- State
- Zip Code
- Mall name (Optional)
- Location ID
- Location Area (Optional)
- Location Description (Optional)
- Location phone number
- Location email address
You will need to assign a user to your store to complete the creation
All newly created stores have to be approved by the admin